

Why Motorcycle Detailing Matters
Many riders wash their motorcycles regularly but overlook areas where contamination builds up over time. Dust settles around engine fins, grease accumulates near the swingarm, and road grime hides inside wheel spokes and suspension components.
Over time these contaminants can:
- Dull painted surfaces
- Stain chrome and aluminum
- Accelerate corrosion
- Damage plastic trim
- Make routine maintenance more difficult
A proper detailing routine removes contaminants before they become permanent problems while protecting the finishes from everyday exposure.
The Difference Between Washing and Professional Detailing
A standard wash removes loose dirt from the motorcycle’s exterior. Professional detailing takes the process much further by carefully cleaning, restoring, and protecting nearly every exposed surface.
A complete detail may include:
- Safe pre-rinse
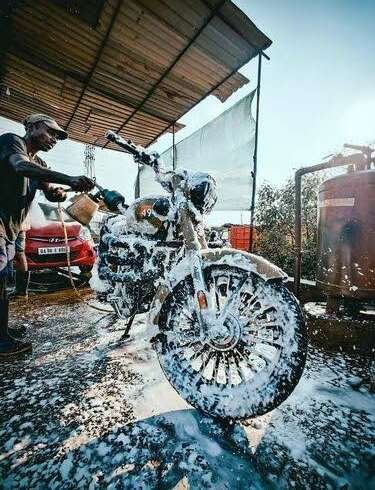
- Hand washing with pH-balanced shampoo
- Wheel cleaning
- Engine bay cleaning
- Chrome polishing
- Paint decontamination
- Protective sealants
- Plastic trim restoration
- Leather seat care
- Windshield cleaning
- Tire dressing (where appropriate)
Each step is designed to improve both appearance and long-term protection.
Start with the Right Preparation
One common mistake I often notice is riders washing their motorcycle immediately after parking. The engine, exhaust pipes, brake rotors, and wheels may still be extremely hot. Applying cold water too soon can create unnecessary stress on certain components while causing cleaning products to dry before they have time to work.
Allow the motorcycle to cool completely before beginning.
Gather clean microfiber towels, soft detailing brushes, quality wash mitts, and motorcycle-safe cleaners before starting.
Step 1: Perform a Gentle Pre-Rinse
The first rinse removes loose dirt, sand, and dust.
Instead of blasting every surface with maximum pressure, use moderate water pressure while working from top to bottom.
Pay close attention to:
- Front forks
- Radiator
- Swingarm
- Wheels
- Rear suspension
- Lower fairings
Removing loose debris first greatly reduces the chance of scratching the paint during washing.
Step 2: Wash Using the Two-Bucket Method
Professional detailers often use two buckets.
One bucket contains clean shampoo solution.
The second bucket contains plain rinse water for cleaning the wash mitt after each section.
This simple method keeps abrasive dirt away from painted panels and greatly reduces swirl marks.
Work in small sections:
- Fuel tank
- Fairings
- Fenders
- Side covers
- Tail section
Always use straight washing motions rather than aggressive circular scrubbing.
Step 3: Clean Wheels Before They Dry
Motorcycle wheels collect brake dust, grease, chain lubricant, and road grime.
Cleaning them while they are still wet makes the process much easier.
Use soft wheel brushes to reach:
- Between spokes
- Around valve stems
- Brake calipers
- Wheel hubs
- Rim edges
Insider tip: Keep a separate set of brushes exclusively for wheels. Brake dust particles are surprisingly abrasive, and using those same brushes on painted panels can introduce fine scratches over time.
Step 4: Remove Bugs Safely
Front fairings, mirrors, headlights, and windshields often collect insects during highway rides.
Rather than scraping dried bugs away, soak them first using a damp microfiber towel for several minutes.
Most residues soften naturally, making removal much safer.
Patience here prevents scratches that polishing later cannot always remove.
Step 5: Carefully Clean the Engine Area
The engine is one of the most overlooked parts of motorcycle detailing.
Dust and oil residue settle between cooling fins and around hoses.
Use:
- Soft detailing brushes
- Low-moisture cleaners
- Microfiber towels
- Compressed air if available
Avoid saturating electrical connectors, exposed wiring, or sensitive electronics.
Paint Decontamination Makes a Difference
Even motorcycles that appear clean often have bonded contaminants attached to the paint.
These include:
- Tree sap
- Industrial fallout
- Road tar
- Iron particles
- Water spots
Paint decontamination removes these stubborn contaminants before they slowly damage the finish.
Once the surface feels smooth again, protective products bond much more effectively.
As explained in this guide on motorcycle detailer stafford va, consistent professional detailing helps preserve both appearance and long-term paint protection.
Protect Painted Surfaces
After cleaning, protection is just as important.
High-quality paint sealants or ceramic coatings create a protective barrier against:
- UV rays
- Dirt
- Bird droppings
- Water spotting
- Road film
The motorcycle stays cleaner longer, and future washing becomes noticeably easier.
Restore Chrome and Metal Components
Chrome quickly loses its shine if contaminants remain on the surface.
Use dedicated chrome polish on:
- Exhaust pipes
- Handlebars
- Mirrors
- Engine covers
- Crash bars
For brushed aluminum, use products specifically designed for that finish to avoid altering its appearance.
Don’t Forget Plastic Trim
Plastic trim fades gradually from UV exposure.
After cleaning:
- Apply UV protectant
- Wipe evenly
- Remove excess product
This helps restore a richer appearance while slowing future fading.
Avoid overly glossy products that attract dust.
Caring for Leather and Vinyl Seats
Seats experience constant exposure to sunlight, rain, and body oils.
Clean gently using products designed specifically for motorcycle seating materials.
For leather:
- Use leather cleaner
- Apply conditioner occasionally
- Avoid soaking seams
For vinyl:
- Use non-greasy protectants
- Remove excess residue completely
A properly maintained seat remains comfortable while resisting premature cracking.
Windshield and Mirror Care
Motorcycle windshields scratch more easily than automotive glass.
Always:
- Use clean microfiber towels
- Apply plastic-safe cleaners
- Wipe gently
Avoid paper towels, which often leave fine scratches behind.
Crystal-clear visibility improves both appearance and rider safety.
Drying Matters More Than People Think
Many riders finish washing and simply let the motorcycle air dry.
Unfortunately, this often leaves mineral deposits and water spots.
Instead:
- Use high-quality microfiber drying towels
- Blow water from tight areas with compressed air or a blower
- Dry mirrors
- Dry around switches
- Dry beneath the fuel tank edges
Insider tip: Water often hides beneath mirrors, fuel caps, and fairing joints. Rolling the motorcycle forward a few feet after drying helps hidden water escape before giving it one final wipe.
Establish a Regular Maintenance Schedule
Professional detailing doesn’t always require a full restoration.
Instead, develop a maintenance routine.
After Every Ride
- Remove insects
- Wipe heavy dust
- Clean windshield
Monthly
- Hand wash
- Clean wheels
- Protect paint
Every Few Months
- Paint decontamination
- Interior storage compartment cleaning
- Chrome polishing
- Plastic restoration
Annually
- Comprehensive professional detail
- Paint correction if needed
- Protective coating renewal
Regular maintenance keeps detailing sessions shorter and much more effective.
Common Mistakes to Avoid
Even experienced riders occasionally make mistakes that shorten the life of their motorcycle’s finish.
Avoid:
- Washing in direct sunlight
- Using household detergents
- Scrubbing dry dirt
- Ignoring brake dust
- Applying tire dressing to tread surfaces
- Using dirty towels
- Skipping protective coatings
- Allowing bird droppings or bug residue to remain for days
Small habits often make the biggest difference over the years.
Final Thoughts
Professional motorcycle detailing is about far more than creating a showroom shine. Every careful wash, protected finish, and properly cleaned component contributes to the motorcycle’s long-term appearance and condition. By using safe cleaning techniques, paying attention to overlooked areas, and applying protective products consistently, riders can enjoy motorcycles that continue to look impressive ride after ride. A thoughtful detailing routine not only preserves the bike’s finish but also makes future maintenance easier, allowing every journey to begin with a motorcycle that looks as good as it performs.