
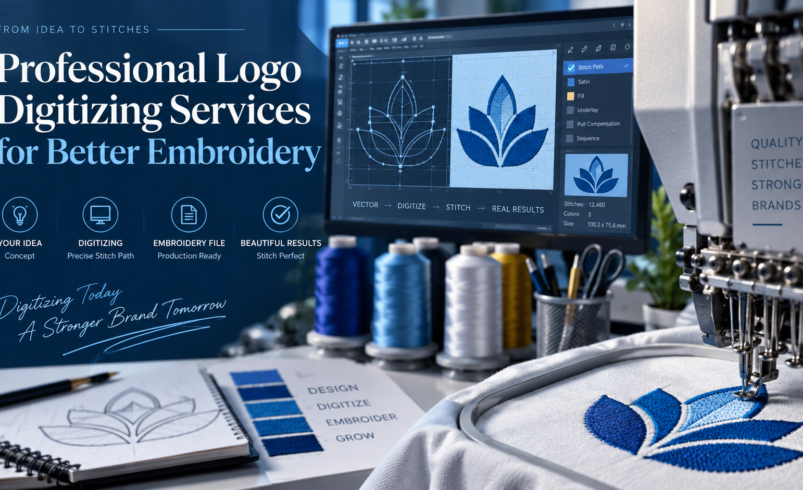

A professional embroidered logo starts with much more than attractive artwork. Logo Digitizing is the process of converting a logo, graphic, symbol, or text into a machine-readable embroidery file. During this process, the digitizer determines stitch types, stitch directions, density, underlay, sequencing, and other technical settings. These instructions tell an embroidery machine how to recreate the original artwork with thread. When the file is prepared correctly, the final embroidery can appear cleaner, sharper, more balanced, and more consistent on different products.
For companies, clothing brands, sports organizations, and promotional businesses, embroidery digitizing for logos plays an essential role in achieving professional results. Regular JPG, PNG, PDF, or other image files do not contain the stitch information an embroidery machine needs. A professionally prepared embroidery file controls how the machine moves through every part of the design, helping reduce unnecessary stitches, registration problems, and production errors.
What Is Logo Digitizing?
Logo Digitizing converts regular artwork into a specialized embroidery format that machines can read. Popular embroidery file formats include DST, PES, EXP, JEF, VP3, and several others. The required format generally depends on the embroidery machine being used.
The process is different from simply converting one image format into another. A digitizer studies every part of the logo and decides which stitch techniques will reproduce it effectively. Large areas, small lettering, borders, thin lines, and complicated shapes may all require different settings.
Some elements may also need to be simplified because thread cannot reproduce extremely tiny details in exactly the same way as pixels or printed ink. Professional judgment is therefore an important part of the process.
Why Quality Digitizing Matters
The quality of Logo Digitizing can directly affect how professional an embroidered product looks. Even excellent artwork can produce disappointing embroidery when the stitch file is prepared poorly.
Incorrect settings can cause problems such as fabric puckering, uneven outlines, thread breaks, excessive stitch buildup, gaps, or distorted lettering. Poor sequencing may also make the embroidery machine travel unnecessarily between different parts of the design.
A properly digitized file helps the machine work more efficiently while preserving important visual elements of the original logo. This can improve consistency when the same design is embroidered repeatedly.
Main Steps in the Digitizing Process
The first step in Logo Digitizing is analyzing the original artwork. The digitizer reviews its dimensions, colors, lettering, shapes, borders, and fine details. The intended embroidery size and product type should also be considered before the stitch file is created.
Next, the digitizer determines which parts of the artwork should use satin, fill, or running stitches. Selecting the correct stitch type helps improve both appearance and stability.
The stitch sequence is then planned. This determines which sections of the logo are embroidered first and which follow afterward. Good sequencing can reduce unnecessary machine movements and help different parts of the design remain properly aligned.
Underlay, density, compensation, and stitch direction are then adjusted according to the artwork and intended material.
Finally, the completed design is exported into the machine format required for production and can be tested through a sample sew-out.
Choosing the Correct Stitch Types
Choosing suitable stitches is an important part of Logo Digitizing because different sections of a design have different requirements.
Satin stitches are commonly used for letters, borders, and narrow shapes. They create a smooth surface that can make important design elements stand out clearly.
Fill stitches are generally used for larger areas. They cover wider spaces efficiently and can be adjusted through different patterns and stitch angles.
Running stitches are typically useful for fine lines, outlines, and small details. They use less thread and can reproduce narrow elements that may not work well with satin or fill stitches.
A professional digitizer does not automatically apply the same stitch technique to every part of the logo. Each section should be evaluated according to its dimensions and purpose.
Stitch Density and Underlay
Stitch density is another major factor in Logo Digitizing. It refers to how closely stitches are positioned together.
If the density is too high, an embroidered area can become stiff and heavy. Excessive density may also contribute to puckering, needle problems, or thread breaks. On the other hand, density that is too low can leave visible gaps between stitches and allow the fabric underneath to show.
Underlay stitches provide a foundation beneath the visible top stitches. They can stabilize the material, improve coverage, and create cleaner edges.
The amount and type of underlay should be selected according to the design and fabric. A lightweight shirt may require a different approach than a thick jacket or textured towel.
Pull Compensation and Stitch Direction
During embroidery, stitches naturally pull fabric toward the center of a stitched area. Logo Digitizing must account for this movement through a technique known as pull compensation.
The digitizer can slightly extend certain edges or shapes so they appear correct after the thread pulls the material. Without proper compensation, outlines may become narrow, borders may move away from their intended position, and filled sections may leave unwanted gaps.
Stitch direction is equally important. Different stitch angles can create visual contrast between sections of the same color. They may also distribute tension more effectively across the material.
These technical adjustments can help transform a basic embroidery file into a more refined design.
How Fabric Changes the Digitizing Approach
Logo Digitizing should consider the type of fabric on which the design will be embroidered. Different materials react differently to needles, thread tension, and dense areas of stitching.
A stable material such as twill usually behaves differently from a stretchy knit shirt. Towels and fleece have textured surfaces that can allow small stitches to sink into the fabric. Caps also present unique challenges because they have curved surfaces and structured panels.
Because of these differences, a file designed for one material may need adjustments before being used on another.
Underlay, density, compensation, and sequencing can all be modified according to the final application. Providing information about the intended product before digitizing can therefore help produce more reliable results.
Managing Small Text and Fine Details
One of the most difficult areas of Logo Digitizing is handling small lettering and detailed artwork.
When letters are reduced beyond a practical embroidery size, spaces between them can close and individual characters may lose definition. Very fine outlines can also become difficult to reproduce with thread.
A skilled digitizer may slightly increase the spacing between letters, strengthen thin lines, or simplify details that would otherwise become unclear.
These adjustments should preserve the overall identity of the original logo while making it practical for embroidery.
The objective is not necessarily to reproduce every individual pixel. Instead, the design should retain its recognizable appearance when recreated using thread and stitches.
Common Problems Caused by Poor Digitizing
Poor Logo Digitizing can create several problems during embroidery production.
Fabric puckering is one common issue. This can happen when excessive stitches place too much tension on the material. Poor stabilization can make the problem worse.
Misaligned borders are another common issue. When pull compensation or sequencing is incorrect, outlines may fail to line up with filled sections.
Thread breaks can occur because of excessive density, very short stitches, poor pathing, or unnecessary movement between sections.
Small lettering may also become unreadable when it has not been optimized properly. Other problems can include uneven edges, bulky corners, unnecessary jump stitches, and excessive trimming.
Correcting these issues during the digitizing stage is generally more efficient than trying to manage them during a large embroidery production run.
Tips for Getting the Best Results
For better Logo Digitizing results, begin with the clearest artwork available. Vector artwork is particularly useful because shapes and lines remain sharp when resized. However, clean high-resolution raster images can also provide enough information for professional digitizing.
Always provide the required embroidery dimensions because design size affects stitch choices and detail levels. A logo intended for a small chest position requires different planning from one designed for the back of a jacket.
The fabric type, product type, preferred thread colors, and machine file format should also be provided whenever possible.
If the same logo will be embroidered at significantly different sizes, consider preparing separate versions instead of simply resizing a single stitch file. This allows important settings to be optimized for each application.
Why a Test Sew-Out Matters
A sample sew-out is an important way to evaluate Logo Digitizing before beginning a large production run.
Computer previews can provide useful information about stitch directions, colors, and sequencing, but they cannot show exactly how a particular fabric will react to the embroidery process.
A physical test allows important areas such as lettering, borders, coverage, alignment, density, and overall appearance to be examined.
If a problem is identified, the embroidery file can be adjusted before dozens or hundreds of products are stitched.
Testing is particularly useful for highly detailed logos, new materials, small lettering, and designs that will be produced in large quantities.
Benefits for Businesses and Apparel Brands
Professional Logo Digitizing can help companies present a more consistent visual identity across employee uniforms, caps, jackets, bags, workwear, promotional clothing, and other branded products.
Clean embroidery can make business apparel look more polished and professional. It can also help customers recognize a company’s visual identity across multiple products.
Another advantage of embroidery digitizing for logos is the ability to optimize the same visual artwork for different embroidery applications. A cap version and a jacket version, for example, may look visually similar but require different technical settings.
Businesses can also keep approved embroidery files for repeat orders. This makes it easier to reproduce previously tested designs while maintaining greater consistency.
Why Professional Digitizing Beats Automatic Conversion
Some embroidery software offers automatic conversion features, but automatic results do not always consider how thread, fabric, and machine movement interact.
Professional Logo Digitizing involves decisions that automated systems may not make effectively. A digitizer can determine where a design should begin, how different sections should overlap, which details need simplification, and how stitch directions should change.
Automatic conversion may sometimes create excessive stitches, poor sequencing, unnecessary trims, or unsuitable density.
Human review is especially valuable for logos containing detailed lettering, several colors, narrow borders, unusual shapes, or small elements.
How Logo Size Affects Embroidery
The final dimensions of a design are another important consideration in Logo Digitizing.
When a large logo is reduced significantly, narrow gaps and small lettering may become too tight to reproduce accurately. Some elements may need to be simplified or enlarged slightly to remain visible.
Larger designs can present different challenges. Broad areas may need adjusted fill patterns or stitch settings to prevent excessive thread buildup.
For this reason, simply scaling an embroidery file up or down does not always create the best results. Important settings may need to be reviewed whenever the embroidery size changes substantially.
Better Brand Consistency Through Digitizing
Consistent branding is important for businesses that use embroidered uniforms, staff clothing, promotional items, corporate apparel, sportswear, and branded accessories. Professional Logo Digitizing helps maintain recognizable shapes, proportions, lettering, and design elements across different products. Working with Idigitize can help businesses prepare embroidery files that are optimized for specific garments, sizes, and applications while keeping the core brand identity visually consistent.
Reliable embroidery digitizing for logos can also help companies organize approved versions of their designs for different uses. A business might maintain separate files for caps, polo shirts, jackets, and patches. Although technical stitch settings may vary between these applications, the overall logo should remain recognizable and professionally presented.
Final Thoughts
Logo Digitizing is both a technical and creative process. It transforms standard artwork into detailed instructions that an embroidery machine can follow.
Successful digitizing requires attention to stitch types, density, underlay, pull compensation, sequence, design dimensions, fabric type, and machine requirements. Each decision can influence how the final embroidered logo looks and performs.
Businesses should therefore view digitizing as more than simple file conversion. It creates the foundation for successful embroidery production.
Professional preparation can reduce common stitching problems, improve design clarity, and support more consistent results across different branded items.
Whether a logo is being prepared for uniforms, caps, jackets, sportswear, promotional products, or accessories, accurate Logo Digitizing can make a meaningful difference. A carefully planned and tested embroidery file helps turn ordinary artwork into clean, durable, and visually consistent embroidery that represents a brand professionally.