

Embroidery machines cannot read regular image files like JPG, PNG, or PDF. They need special embroidery files that contain stitch data. Many beginners think they can send an image straight to the machine, but that almost always leads to poor results. A proper embroidery file helps the machine know where to place every stitch, when to change colors, and how to create a clean design.
Before you Convert Artwork to PES Files, it is important to understand why this step matters. A well-made PES file helps improve stitch quality, reduce machine errors, and create embroidery that looks neat on many types of fabric. Whether you are stitching a company logo, a custom patch, or a personal design, the right file makes a big difference.
This guide explains why PES files are important, how they improve embroidery quality, and why professional digitizing gives better results than automatic file conversion.
What Is a PES File?
A PES file is one of the most popular embroidery file formats. It is mainly used by Brother and Baby Lock embroidery machines.
Unlike an image file, a PES file does not store pixels. Instead, it stores embroidery instructions.
These instructions tell the machine:
- Where each stitch begins
- Where each stitch ends
- Which stitch type to use
- When to change thread colors
- The order of stitching
Without this information, an embroidery machine cannot produce the design correctly.
Why Images Cannot Be Stitched Directly
A digital image looks good on a computer because it is made of tiny pixels. An embroidery machine cannot understand those pixels.
It only understands stitches.
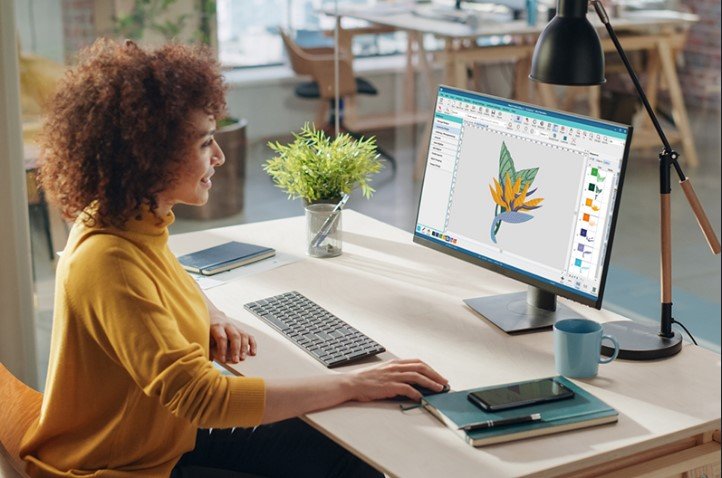
This means every image must first be changed into stitch data through embroidery digitizing.
During this process, each part of the artwork is carefully planned for embroidery.
What Happens During Artwork Conversion?
Artwork conversion is much more than changing one file format into another.
A digitizer studies the artwork and decides:
- Which stitch types to use
- Stitch direction
- Stitch density
- Underlay stitches
- Pull compensation
- Stitch sequence
These settings help the design stitch smoothly on fabric.
Benefits of Converting Artwork to PES Files
A properly digitized PES file improves almost every part of the embroidery process.
Better Stitch Quality
Professional PES files create clean and smooth stitches.
Lines appear sharper.
Shapes stay balanced.
Letters become easier to read.
Fewer Machine Problems
Good embroidery files reduce many common issues.
These include:
- Thread breaks
- Needle breaks
- Bird nesting
- Thread trimming problems
- Machine stops
The machine works more smoothly because the stitch path is properly planned.
Cleaner Design Details
Fine details require careful stitch placement.
Professional digitizing keeps important parts of the artwork clear without adding unnecessary stitches.
Faster Production
Efficient stitch paths reduce machine running time.
Less time means higher production and lower operating costs.
Why Automatic Conversion Often Fails
Many websites promise instant embroidery file conversion.
Although these tools seem easy, they rarely produce professional results.
Automatic software cannot fully understand:
- Fabric movement
- Thread pull
- Stitch angles
- Density balance
- Machine limitations
The result is often poor embroidery quality.
Common Problems with Auto Conversion
Too Many Stitches
Extra stitches make embroidery thicker than necessary.
This increases production time.
Poor Stitch Direction
Wrong stitch angles make the design appear rough and uneven.
Missing Small Details
Tiny objects often disappear during automatic conversion.
Uneven Density
Some areas become too thick while others remain too light.
This creates an unbalanced design.
Why Professional Digitizing Makes a Difference
Professional digitizing combines software with real embroidery knowledge.
Experienced digitizers understand how thread behaves on different fabrics.
They know how to adjust:
- Stitch density
- Underlay
- Pull compensation
- Stitch order
- Travel stitches
Every decision improves the final embroidery.
Choosing the Right Artwork
The quality of the original artwork affects the final embroidery.
A clean design is much easier to digitize.
Best Artwork Types
The following files usually give the best results:
- AI
- EPS
- SVG
- High-resolution PNG
- High-quality PDF
- Large JPG files
Avoid blurry or low-quality images whenever possible.
Understanding Stitch Types
Different parts of a design require different stitch styles.
Satin Stitch
This stitch works well for:
- Text
- Borders
- Narrow shapes
It creates a smooth finish.
Fill Stitch
Fill stitches cover large areas.
They provide solid color coverage.
Running Stitch
Running stitches work well for:
- Fine details
- Thin outlines
- Decorative lines
Choosing the correct stitch type helps preserve artwork quality.
Fabric Also Matters
A design that works perfectly on one fabric may not work well on another.
Every fabric behaves differently during embroidery.
Stable Fabrics
Examples include:
- Denim
- Canvas
- Twill
These fabrics usually hold detailed designs very well.
Stretch Fabrics
Examples include:
- T-shirts
- Polo shirts
- Jersey fabric
These materials need extra adjustments to prevent distortion.
Professional digitizers prepare the file according to the fabric being used.
Why Test Stitching Is Important
Never skip the sample stitch.
Testing helps find small problems before full production.
A sample can reveal:
- Thread breaks
- Color issues
- Poor registration
- Incorrect density
- Small lettering problems
Fixing these issues early saves both time and money.
Common Mistakes Beginners Make
Many new embroidery users repeat the same mistakes.
Using Low-Resolution Images
Poor artwork creates poor embroidery.
Always start with the best image available.
Ignoring Fabric Type
Every material responds differently to stitches.
The file should match the fabric.
Choosing the Wrong Stitch Density
Too much density causes thick embroidery.
Too little density leaves gaps.
Finding the right balance is essential.
Skipping Manual Editing
Automatic files often need manual corrections.
Ignoring these edits lowers embroidery quality.
When Should You Use Professional Digitizing?
Professional digitizing is recommended for:
- Business logos
- Uniform embroidery
- Hats
- Custom patches
- Promotional products
- Sports apparel
- Detailed artwork
- Small lettering
These designs need careful planning for clean embroidery.
Professional services also help reduce production mistakes.
Companies like Absolute Digitizing use experienced digitizers who carefully prepare every design for machine embroidery. Their focus is on creating clean, machine-ready files that deliver consistent stitching across different embroidery projects.
Tips for Better PES File Results
Follow these simple tips to improve embroidery quality every time.
Start with Quality Artwork
Sharp artwork creates better embroidery.
Keep Designs Simple
Very tiny details may not stitch well.
Simplify where needed.
Match the File to the Fabric
Always consider the material before digitizing.
Test Before Production
A sample run helps catch hidden problems.
Work with Skilled Digitizers
Experience often produces better embroidery than software alone.
Final Thoughts
Converting artwork into a PES file is one of the most important steps in machine embroidery. It changes a simple image into detailed stitch instructions that your embroidery machine can understand. A properly digitized PES file improves stitch quality, protects fine details, reduces machine problems, and creates embroidery that looks clean and professional.
While automatic converters may seem convenient, they cannot replace the knowledge and experience needed to build a high-quality embroidery file. If you want reliable results for logos, apparel, patches, or custom designs, professional digitizing is always a smart investment. Absolute Digitizing provides carefully prepared, machine-ready PES files that help embroidery machines produce accurate, smooth, and long-lasting results on a wide range of fabrics.